What is ZOOM?
Zoom is a web conferencing tool that unifies cloud video conferencing, online meetings, and collaboration in an easy to use platform. Click to watch the video.
Zoom's extensive features, compatibility with desktop and mobile devices and H.323 room system, allows participants to have a rich web conferencing experiences with both NUS and external users.
Features:
- Easy to launch and join with up to 300 participants
- HD video, high quality audio using VOIP
- Screen sharing and collaboration features
- Co-annotation and whiteboard
- Video breakout rooms
- MP4 recording
ANNOUNCEMENT
- For the safety and privacy of our NUS community and friends when Zooming, please note:
- Enable "Only Authenticated Users can Join" is recommended.
Select "Sign in to Zoom for NUS Staff and Students only".
This will restrict so that only NUS Staff and Students with NUS Zoom accounts will be able to join the meeting. - Additional recommendation on Securing our Meetings.
- From 01 July 2020, all new Zoom Cloud Recordings will be set to: Only Authenticated Users can View.
Viewers will have to sign in with their NUS Zoom account to watch the Zoom cloud recordings. External viewers will not be able to view the Zoom cloud recordings.
Guide to share your Zoom cloud recording with external viewers.
- Enable "Only Authenticated Users can Join" is recommended.
- Zoom Recording Guidelines
Changes on Zoom licenses for students.
Dear Students,
We have changed how Zoom licenses are allocated in NUS. Students without teaching duties are no longer entitled to a licensed account as we have a limited number of licensed accounts. Students will be allocated basic accounts and can still schedule Zoom sessions for up to 40 minutes.
If you are a student Teaching Assistant or need a Zoom licensed account to conduct certain events, let us know the module code / module coordinator and special event here.
Other alternatives:
· Skype for Business Online Edition
· Zoom Basic Plan has no time limit for 1-to-1 calls. Group calls has a 40mins time limit.
Best Regards
NUS Zoom Team
Sign In
Sign in first via the web portal to activate your NUS Zoom account
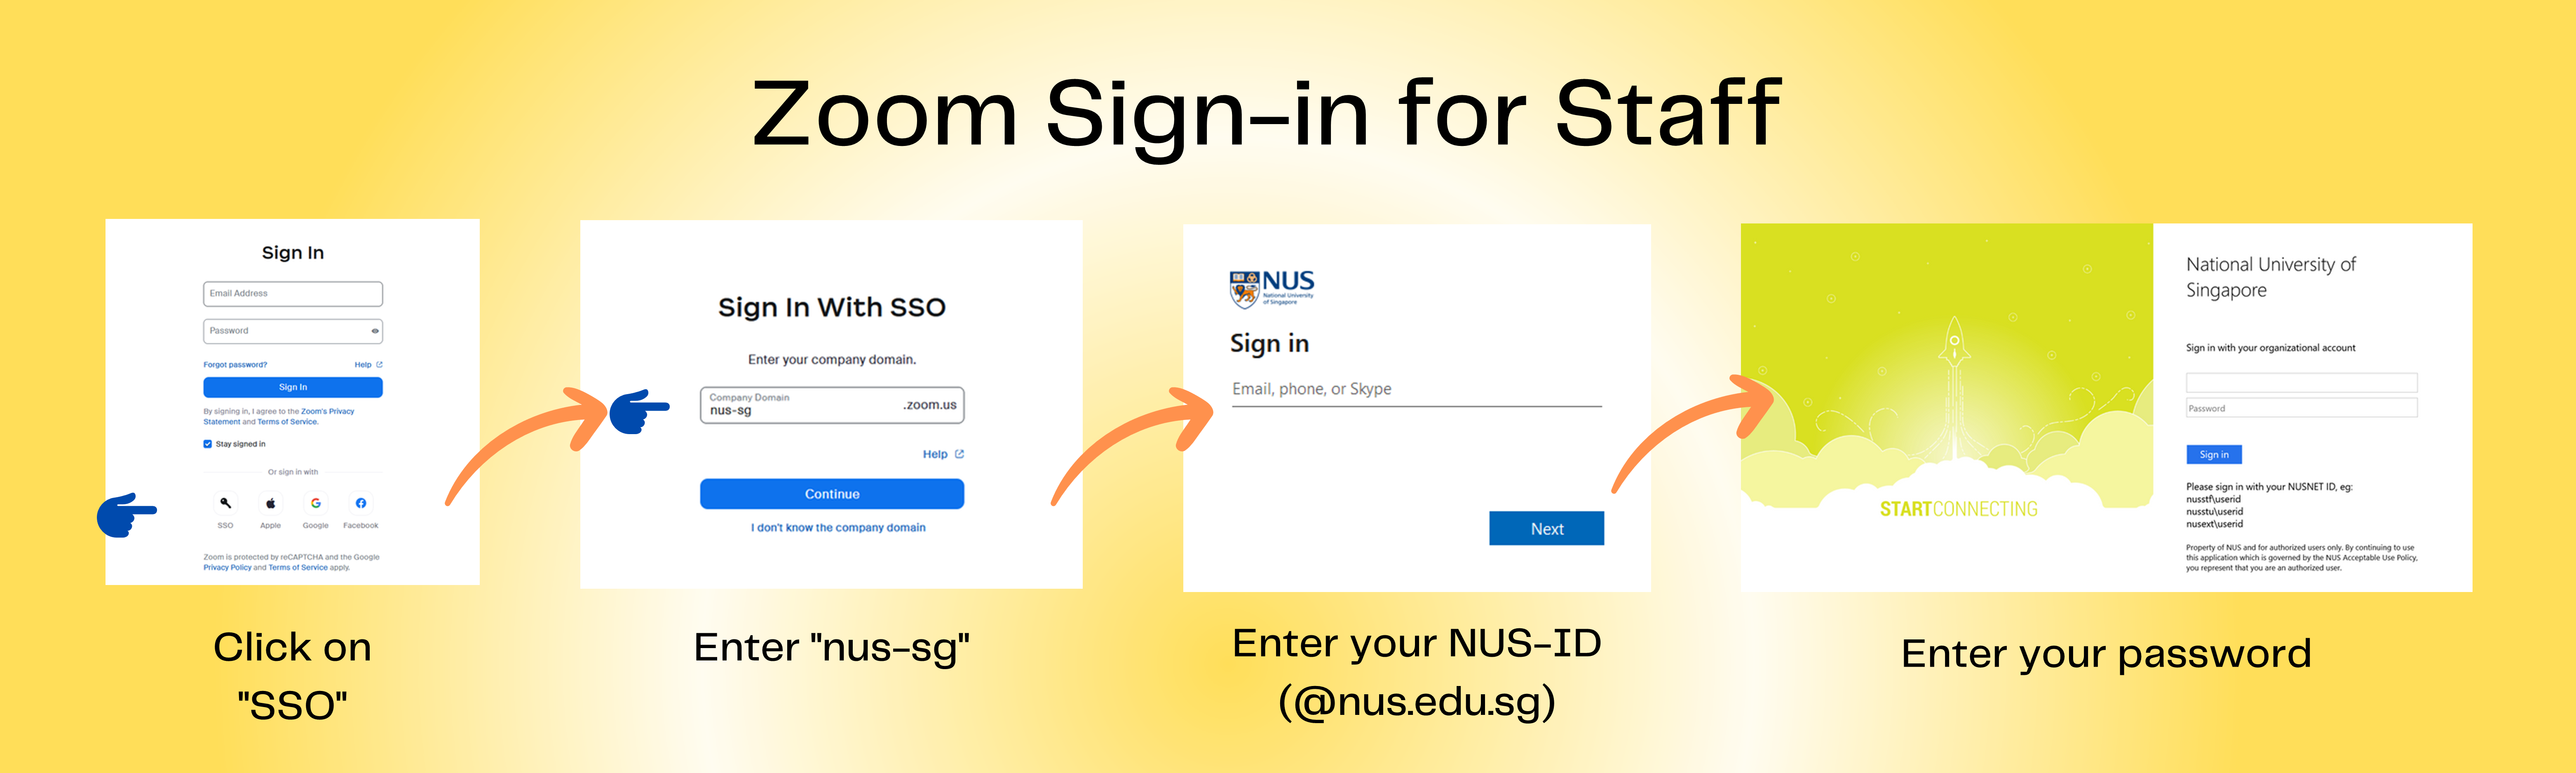
- Go to https://nus-sg.zoom.us
- Click Sign-in.
- Sign in with your NUS ID and password.

- You have now activated your ZOOM account with NUS.
You will be taken to a Zoom Portal on your browser where you can schedule a meeting. You can now schedule a Meeting using either the Zoom Portal, LumiNUS or the Zoom Client.
Activate your NUS Zoom account
Please sign-in at https://nus-sg.zoom.us first to activate your NUS Zoom account.
If you have a previous Zoom Account that uses your NUS Email address
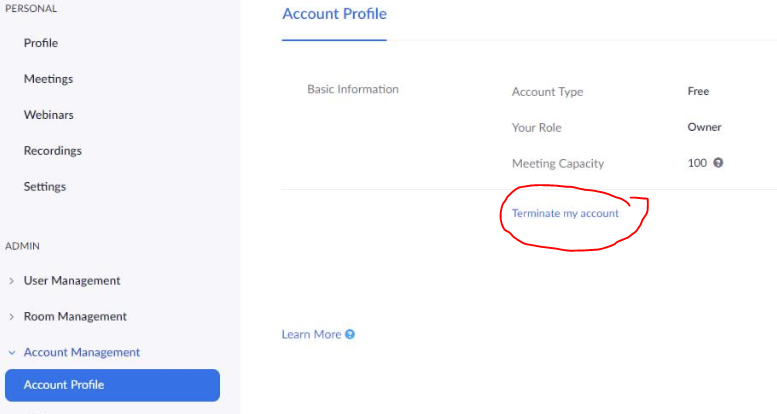
You will have received an email invitation to switch the account over. If you did not receive it, you can also terminate the previous account.
- Sign-in to https://www.zoom.us/signin
- Download any previous recordings that you have or meeting details that you need.
Click on Account Management > Account Profile and click on "Terminate my account".
- Go to https://nus-sg.zoom.us and sign in with your NUSNET ID and password.


Step 1: Download Zoom Meeting for Android app..

Step 2: Click Sign In. And Sign in with SSO. Do not use the email address sign in.

Step 3: Click on "I know the company domain".
Type in nus-sg

Step 4: Sign in with NUSNET ID and password.

Step 5: If your host has provided with you with a join URL link, click that link.
If your host has provided you with a Zoom Meeting ID and password, click on Join.
Step 6: Type in the Meeting ID and click OK.

Step 7: Click Join Audio button.
Select Call via Device Audio.
Step 8: Click on the Participant button to access the Participants Panel and Feedback buttons like Raise Hand and Chat.

- Sign-in to https://www.zoom.us/signin
- Download any previous recordings that you have or meeting details that you need.
Click on Account Management > Account Profile and click on "Terminate my account".
- Go to https://nus-sg.zoom.us and sign in with your NUSNET ID and password.
Step 1: Download Zoom Meeting for iOS app.

Step 2: Click Sign In. And Sign in with SSO. Do not use the email address sign in.

Step 3: Click on "I know the company domain".
Type in nus-sg

Step 4: Sign in with NUSNET ID and password.

Step 5: If your host has provided with you with a join URL link, click that link.
If your host has provided you with a Zoom Meeting ID and password, click on Join.
Step 6: Type in the Meeting ID and click OK.

Step 7: Click Join Audio button.
Select Call using Internet Audio.
Step 8: Click on the Participant button to access the Participants Panel and Feedback buttons like Raise Hand.

Step 9: Click on More button to access the Chat panel.

Schedule
Scheduling a Meeting via NUS Zoom's Web Portal
- Go to NUS Zoom Portal at https://nus-sg.zoom.us and click Sign In.

- Sign in with your NUSNET ID and password.

- Click Schedule a Meeting.
Fill up the meeting information

Recommended to use the following options:
- Disable join before host:
Prevent participants to join the meeting before you join. - Enable Mute participants on entry:
This will mute participants as they join the meeting. Participants can unmute themselves after joining the meeting.
Note: To mute all participants currently in a meeting, see the options to manage participants. - Enable waiting room:
Allows the host to screen participants by placing them in a waiting room first. Host then admits them into the meeting room. - Enable Only authenticated users can join:
Restrict access to the meeting so that only NUS staff and students signed-in with SSO Domain nus-sg can join.
Click Save.
Click on Outlook Calendar or Copy the invitation.

- Paste the invitation to an email for your guests or if it's for your class in LumiNUS, you can add to an Announcement, Learning Flow or Weblink.
Remind participants not to share the link with anyone or anywhere. - Download Zoom Client for your laptop: Win | Mac
- On the actual day, start and launch from the Zoom Client or NUS Zoom portal.

- Launch the Zoom Desktop Client
- Click Sign-in with SSO. Domain is nus-sg.
- Sign in with your NUSNET ID and password.
- Click Schedule a Meeting.
Fill up the information.
Recommended to use the following options:
- Enable waiting room:
Allows the host to control when participants join the meeting by placing them in a waiting room first. - Disable join before host:
Prevents participants from joining the meeting without you or before you join. - Enable Mute participants on entry:
This will mute participants as they join the meeting. Participants can unmute themselves after joining the meeting. Note: To mute all participants currently in a meeting, see the options to manage participants. - Enable Only authenticated users can join: (This option not available on desktop client. Use the web portal for this option.)
Restrict access to the meeting so that only NUS staff and students signed-in with SSO Domain nus-sg can join.
- Enable waiting room:

- Click Schedule.
- If you had selected Outlook Calendar, it will open a new meeting with the meeting details. You can then type in the participants email addresses.
- You can also go to Meetings to copy out the Invitation.

You can download the Outlook plugin here: https://nus-sg.zoom.us/download#outlook_plugin
Once installed, you can click the "Schedule a meeting" in Outlook.
It will prompt you to launch and sign-in to your
- Click the "Sign In with SSO" button.

- Type in nus-sg and click Continue..

Once completed, you will see the normal new Outlook meeting page.
Download
Download Zoom for: Win | Mac | Linux | iPhone | Android.
Once installed, join the Test Meeting and test your system.
Video Guides (by Zoom)
Scheduling and Joining
- Schedule a Meeting with Zoom Portal | Scheduling a Meeting with Outlook
- Join a Meeting
- Joining and Configuring Audio & Video
Basic Features
- Meeting Controls
- Security Button NEW
- Managing the Participants
- Waiting Room
- Sharing Your Screen
- Recording a Zoom Meeting
Advanced
Additional user guides can be found on the Zoom support site. Use the Search field or Help button to find a solution.
FAQ
NUS Community Related FAQs for Zoom
NUS Zoom Education License

Zoom Single-Sign On Migration
NUS IT has enhanced our Zoom Single-Sign-On integration recently. If you had registered for a personal Zoom account with your NUS email address previously, it would affect your eligibility to use Zoom services such as Zoom Meetings, Zoom Chat and other Zoom services that are associated with NUS.
To resolve this account conflict, you need to terminate your Zoom personal account using both your NUSID and NUS friendly email address.
After you have terminated your Zoom personal account, a corporate Zoom account will be created for you automatically.
Before doing these steps, please ensure you do not need to use Zoom meeting services for the rest of the day.
No. | Steps |
1 | Terminate your personal Zoom account that is registered with your NUS email address.
|
Wait till the next day before proceeding to the next step. | |
2 | Your new NUS Zoom corporate account should be ready. Notes:
|


FAQ
Q1. I had an SSO SIgn In Error after receiving my new NUS ID, changed my NUS ID or NUS Friendly Email Address.
Ans: Since 20 May 2023, accounts will be pre-provisioned from the NUS Active Directory system. It may take a day for the information to by synced.
** Please do not register for new account at zoom.us with the NUS email address.
Q2. My Zoom Free Basic account is not with NUS Zoom. And I can't Sign In with SSO, company domain: nus-sg. What do I do?
Ans: Please terminate your Basic FREE Zoom account. Once done, wait for 24hours, then Sign In with SSO, company domain: nus-sg
Q3. I am a returning student, and I can't Sign In with SSO , company domain: nus-sg. What do I do?
Ans: You will not be able to login to your previous NUS Zoom account as Zoom disabled it after you left NUS.
Please add/change your NUS friendly email address as a workaround.
https://exchange.nus.edu.sg/stfpea
Wait till next day, then try sign in again with SSO, company domain: nus-sg.
Q4. Error Message: Sorry, but we're having trouble signing you in.
AADSRS50105: Your administrator has configured the application Zoom to block users unless they are specifically granted ("assigned") access to the application. The signed in user 'yournameoruserid@nonNUSemaildomain' is blocked because they are not a direct member of a group with access, nor had access directly assigned by an administrator. Please contact your administrator to assign access to this application.
The error message indicates a Sign In attempt with <'yournameoruserid@nonNUSemaildomain>.
Your NUS Zoom account should be <staffID@nus.edu.sg> or <studentID@u.nus.edu>, hence the error.
To prevent your device from signing you in automatically with <'yournameoruserid@nonNUSemaildomain>,
use a different web browser or use the incognito/private browsing mode.
- Go to NUS Zoom web portal: https://nus-sg.zoom.us
- Click Sign In.
- When prompted to provide account email, type in <staffID@nus.edu.sg> or <studentID@u.nus.edu>
Q5. What and when is the Zoom Phone migration?
For more info on NUS IT Telephony - FAQ – Zoom Account & Login
Q6. I have deleted my personal Zoom account with NUS email address but I still cannot sign in with SSO.
Please wait till the next day for the account to be pre-provisioned in NUS Zoom.
Please email to Zoom Phone Deployment Team and provide the password reset confirmation that there is no account associated with the email address.

Q7. Sign In error possible due to multiple account sign-in before.
https://support.zoom.us/hc/en-us/articles/7970865190285-Clearing-Zoom-cache-and-cookies

If you have changed your NUS Email address or NUS Friendly Email address, please fill up and submit this form here.
If you have a previous account with Zoom using your NUS Email Address, please terminate the previous account first.
- Sign-in to https://www.zoom.us/signin
- Download any previous recordings that you have or meeting details that you need.
Click on Account Management > Account Profile and click on "Terminate my account".
- Go to https://nus-sg.zoom.us and sign in with your NUSNET ID and password.
Schedule
You can download the Outlook plugin here: https://nus-sg.zoom.us/download#outlook_plugin
Once installed, you can click the "Schedule a meeting" in Outlook.
It will prompt you to launch and sign-in to your
- Click the "Sign In with SSO" button.
- Type in nus-sg and click Continue..
Once completed, you will see the normal new Outlook meeting page.
Setup
Your manager or colleague should sign in to https://nus-sg.zoom.us and grant you you scheduling privileges for their Zoom Licensed Account.
Instructions you can provide to your manager or tutors to assign scheduling privilege to you:
This is how you can assign scheduling privileges to me.
|
Schedule Meeting for..
Check you can schedule a meeting via the NUS Zoom web Portal https://nus-sg.zoom.us
You will see a new option called "Schedule For" with a pull-down option with your manager's, colleague's, or tutor's name.
Reports
To access the session attendance reports, use the pull down to select whose reports you'd like to access.
Active Hosts Report - Zoom
https://nus-sg.zoom.us/account/my/report

Cloud Recording
To access the session cloud recordings, click Advanced Search and use the pull down to select whose reports you'd like to access.
For sessions hosted by others, you will have to click on the meeting topic.

You will then provide a registration link to your audience instead of a Join URL.
Participants will register, and depending on Manual or Automatic Approval, they will then receive the Meeting Invitation from Zoom.
- Schedule a meeting with Registration Required.
Registration option is only available on the web portal only.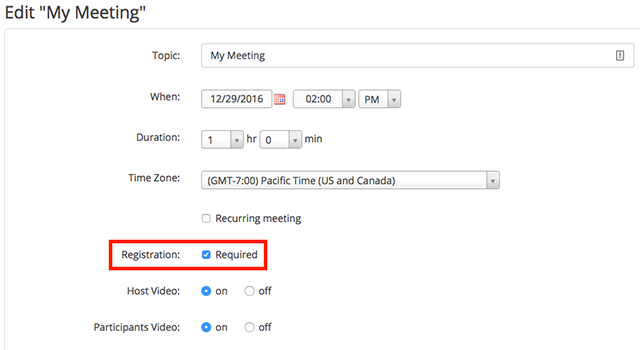
- Invite Attendees
In this section, you can find your meeting link and the list of registrants. You can also set the type of registration for the meeting.
- Registration Options
Configure the registration option by selecting the approval type, registration questions, and some additional registration settings.- There are 2 types of approval:
- Automatic Approval: Anyone who signs up will receive information on how to join.
- Manual Approval: Anyone who signs up will need to be approved by the host on the meeting management page.
You can opt in or out for email notifications when someone registers.
You can also not allow registration after the scheduled meeting time has passed.
- There are 2 types of approval:
- Select which questions are required and optional.
- Custom questions are supported. Example: Faculty, Country.
Registration helps to ensure only approved registered user gets a unique join URL from Zoom. Others will not be able to join without registration even if they have the Meeting ID and Passcode.
Zoom only requires the First Name and Email Address from registrants, so that they can send out the invitation confirmation and information.PDPA
Note that you are responsible for handling the data provided by your registrants.
Do not ask more than necessary.
You may also want to mention how you will use the data you obtain on the registration page.

Prerequisites
- Breakout Room is enabled in your meeting settings
- Host: Zoom Desktop Client on Windows or macOS, version 5.7.0 or higher
- Participants: Zoom Desktop Client or Mobile App, version 5.7.0 or higher
Note:- When joining a meeting with pre-assignments, ALL participants need to be signed in to their NUS Zoom account on the desktop client for pre-assignments to work.
Participants will not be placed in the pre-assigned room if they join from the web client.
Participants will not be placed in the pre-assigned room if the email does not match.
Check NUS Zoom Sign In and Email Address
- Click Sign in with SSO.
- Type in the company domain as: nus-sg and click Continue.
Limitations
- You can only pre-assign participants that have a Zoom account (internal or external Zoom users).
- When pre-assigning participants using the web portal, you can only pre-assign NUS Zoom users that are in the same account.
- To pre-assign participants that are external Zoom users, import a CSV file.
- If you have registration enabled and external participants register for the meeting, you need to assign them to breakout rooms during the meeting.
- Up to 200 participants can be pre-assigned to breakout rooms.
Pre-assign Breakout Room via the Web Portal
- Sign in to the NUS Zoom web portal.
- Click Meetings and schedule a meeting.
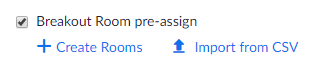
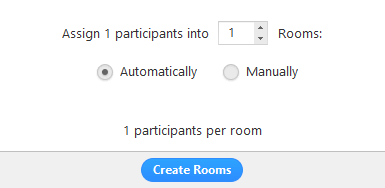
- In the Meeting Options section, select Breakout Room pre-assign and click Create Rooms.
- Click the plus icon beside Rooms to add breakout rooms.
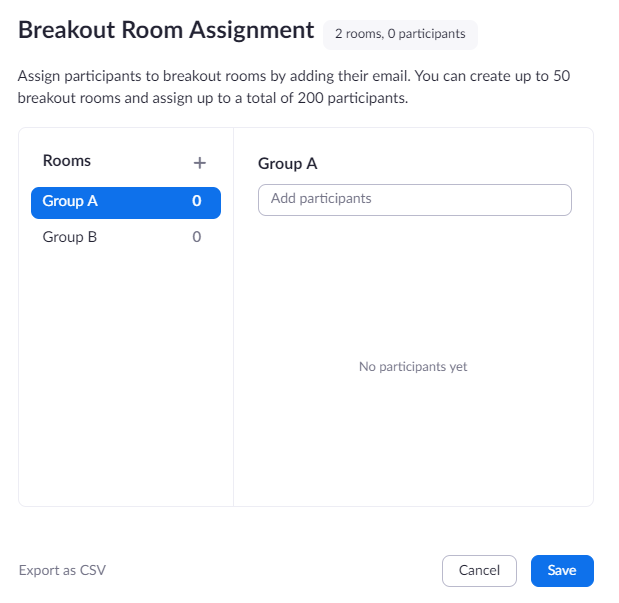
- Hover over the default breakout room name and click the pencil icon to rename it.

- In the Add participants text box, search for participants' name or email address to add them to the breakout room.
Note: You can add internal Zoom users that are in the same account. To pre-assign participants that are external Zoom users, import a CSV file.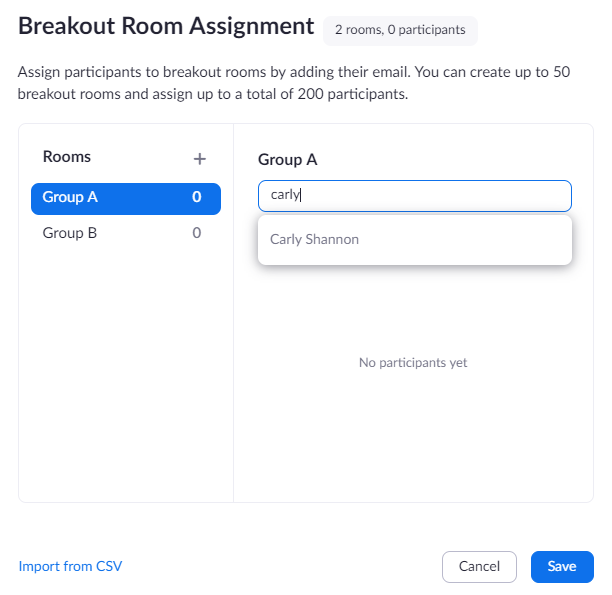
- (Optional) Use these options to edit your breakout rooms and participants:
- Click and drag a participant's email address to change the order.
- Hover over a participant's name to see options to move them to another room or remove them from the current room.
- To delete a breakout room, hover the room name in the left panel and click the trash bin icon.
- Click Save.
Pre-assign Breakout Room using the .csv file
- Sign in to the NUS Zoom web portal.
- Click Meetings and schedule a meeting.
- In the Meeting Options section, select Breakout Room pre-assign and click Import from CSV.
- Click download to download a sample CSV file you can fill out.
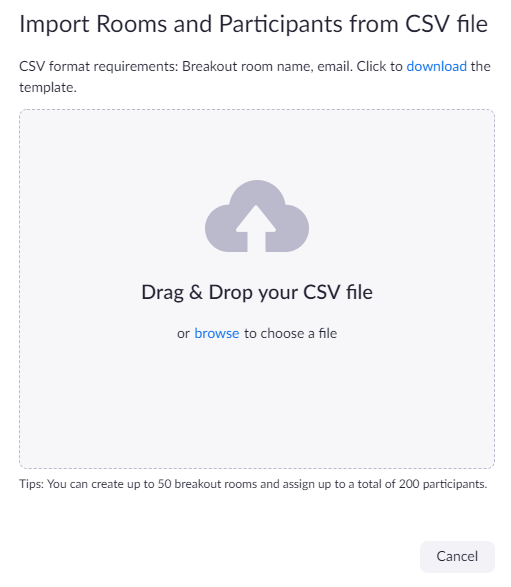
- Open the CSV file with spreadsheet software like Microsoft Excel.
Note: You can specify internal or external Zoom users. - Fill in the Pre-assign Room Name column with the breakout room name, and the Email Address column with the assigned participant's email address.
- Save the file.
- Drag and drop the file in the web portal.
Zoom will verify that the email address has a Zoom account.
Meeting Controls
They are useful in managing the bigger lecture groups, make meetings like an event webinar and also to prevent "Zoom Bombers" from taking over your stage.
Q&A NEW
How to schedule a meeting with Q&A
- Sign in to the Zoom web portal.
- In the navigation menu, click Meetings.
- Choose to edit an existing meeting or schedule a new meeting.
- Under Meeting Options, select the check box to enable Q&A.
Note: If the option is missing, it has been disabled at the account level, and you will need to contact your Zoom administrator. - Click Schedule.
NOTE: This option is not available in Canvas yet. Schedule the meetings first, then Edit this Meeting in Zoom web portal.
Edit Q&A options
- Sign in to the Zoom web portal.
- In the navigation menu, click Meetings.
- Click the topic of your meeting.
- At the top of the meeting details, click the Q&A tab.
- Click Edit to adjust the following settings:
- Allow anonymous questions: Select this option to allow participants to send questions without providing their name to the host and co-hosts.
- Allow participants to view: Choose if you want attendees to be able to view answered questions only or view all questions.
- If you choose for participants to view all questions, you can then enable the following options:
- Participants can upvote: Participants can view all submitted questions and upvote questions important to them. This can help point out to the host and co-hosts questions that more participants want the answer to.
- Participants can comment: Participants can view all submitted questions and add additional comments.
- Click Save.
Note: These options can also be configured by the host in the live meeting.
Manage Q&A during a meeting
Answer submitted questions
- As the host or co-host, click Q&A
 in the meeting controls.
All submitted questions will be listed, with questions submitted by attendees external to the account indicated by (Guest) next to their name. - Find the question you would like to answer:
- Click Answer Live to mark the question as something that will be answered out loud during the meeting.
- Click Type Answer to provide a written response for the participant. Type your answer and click Send.
Note: If you allow participants to comment on questions, the questions will still appear in the Open list and can be responded to, even if a participant has commented on the question.- (Optional) Select the Send Privately checkbox before clicking send, if you would like to answer to the participant only.
- As the host or co-host, click Q&A in the meeting controls.
- All submitted questions will be listed, with questions submitted by attendees external to the account indicated by (Guest) next to their name.
- Find the question you would like to answer:
- As the host or co-host, click Q&A
- Click Answer Live to mark the question as something that will be answered out loud during the meeting.
- Click Type Answer to provide a written response for the participant. Type your answer and click Send.
Note: If you allow participants to comment on questions, the questions will still appear in the Open list and can be responded to, even if a participant has commented on the question. - (Optional) Select the Send Privately checkbox before clicking send, if you would like to answer to the participant only.
Dismiss questions
- As the host or co-host, click Q&A in the meeting controls.
- Hover over the question that you would like to dismiss and click the ellipsis icon
 .
. - Tap Dismiss or Delete.
Dismissed questions will no longer be visible to participants and moved to the Dismissed tab for the host and co-hosts, while deleted questions will be fully deleted and cannot be reopened.
Reopen dismissed questions
- As the host or co-host, click Q&A in the meeting controls.
- In the top-right corner of the Q&A window, click the gear
 to open the settings window.
- Allow anonymous questions: Check this option to allow participants to send questions without providing their name to the host and co-hosts.
- Allow participants to view: Check either if you want attendees to be able to view answered questions only or view all questions.
- If you choose for participants to view all questions, you can then enable the following options:
- Participants can upvote: Participants can view all submitted questions and upvote questions important to them. This can help point out to the host and co-hosts questions that more participants want the answer to.
- Participants can comment: Participants can view all submitted questions and add additional comments.
- If you choose for participants to view all questions, you can then enable the following options:
Additional Guide: Using Q and A in Zoom Meetings – Zoom Support
Focus Mode
Zoom now offers the new Focus Mode to help students focus better during online learning. It allow students to stay attentive.
Focus mode can be started by Host and Co-Hosts of the meeting, using a Zoom desktop client with version 5.7.3 or higher.
- Students will continue see host, co-hosts videos, spotlighted participants and shared presentations
- Host and co-host(s) will continue to see all participant's videos
- Participants will not see other participants (non-hosts) videos
- Participants will only see other participants boxes with their display name
- Participants can still see other participants non-verbal feedback or reactions, and hear them when unmuted
- Participants can still see their own video
To start Focus mode as the host or co-host of a meeting:
- Start a meeting as the host or co-hosts.
- Click More on the meeting toolbar.
- Click Start Focus Mode.
- Click Start to confirm, or select the Don’t ask me again check box to skip this confirmation going forward.
- When Focus mode begins, you and the participants are notified with a banner along the top of the video window.
The focus mode icon is always visible in the top-left corner of the video window, next to the encryption icon, while focus mode is active.
To end Focus mode:
- Click More on the meeting toolbar.
- Click Stop Focus Mode.
Additional Guide: Focus mode – Zoom Help Center
Security Button (in-meeting security options)
- Once you have started the Zoom meeting, click on Security Button
 .
.
- Select/unselect the relevant options. What each option does:
- Lock Meeting: Prevents new participants from joining the meeting.
- Enable Waiting Room: Enables Waiting Room for incoming new participants
- Hide Profile Pictures: Hide all profile pictures, including the host. Display names are shown instead.
- Share Screen: Allows participants to share their screens.
- Chat: Allows participants to use the text chat function.
- Rename themselves: Allow participant to rename themselves.
- Unmute themselves: Allow participant to unmute their mic themselves.
- Start Video: Allow participant to start sending their webcam video
- Share Whiteboard: Allows participants to share whiteboards.
- Suspend Participant Activities All video, audio, in-meeting chat, annotation, screen sharing, and recording during that time will stop, and Breakout Rooms will end.
Allow Participants to Chat with Host(s) only
In the host controls, click on Security Button.
- Check Allow Participants to Chat:
In the host controls, click on Chat Button.
- You may want to control who attendees can chat with:
- No one: Disable the text chat.
- Host only: Allows them to ONLY chat with Host and Co-Hosts.
- Everyone publicly: Allows them to ONLY chat publicly. No private chat.
- Everyone publicly and privately: The default option. Allows them to chat publicly and privately.

Spotlight video on yourself or a selected participant
- Hover over the video of the participant you want to spotlight and click ...
- Select Spotlight Video.
- Spotlight video puts a participants as the primary active speaker for all participants.
- All participants will only see this speaker as the active speaker.
Note: Pin video is different. Pin video will only make the participant as primary only on your device.
Use with Poll Everywhere for an enhanced Live Response tool
- In Zoom, you can do a simple poll with single option or multiple option MCQ.
- You may want to consider using Poll Everywhere to engage students just like in a physical class.
- There are questions types Q&A and Word Cloud which are highly popular.
- Refer to the step by step guide on using Poll Everywhere with Zoom.
Co-Hosts
Allows someone else to manage the administrative side of the meeting, such as muting participants or starting/stopping the recording.
- Co-hosts should be assigned during the meeting.
- There is no limitation on the number of co-hosts you can have in a meeting.
- Co-host will automatically be the host if the host gets disconnected.
Co-hosts do not have access to the following controls as they are only available as host controls in a meeting:
- Start closed captioning and assign someone or a third-party to provide closed captioning
- Start live streaming
- End meeting for all participants
- Make another participant a co-host
- Start breakout rooms or move participants from one breakout room to another
- Start waiting room (co-hosts can place participants in waiting room or admit/remove participants from the waiting room)
Co-hosts also cannot start a meeting. If a host needs someone else to be able to start the meeting, they can assign an alternative host.
Alternative host
Allows you to schedule meetings and designate another NUS Zoom Licensed user to start the meeting if Host who schedules is not able to start the meeting.
- There is no need to schedule someone who will be Co-Host as Alternative Host. Make them co-hosts in the meeting itself.
- The meeting will still belong under the Host who schedules account.
You will not be able to start another concurrent meeting, since Zoom allows each account to only start one meeting at a time. - Alternative Host will need to have an NUS Zoom Licensed account. Not for external or Basic account.
- Alternative Host will receive an email notifying them that they've been added as an Alternative Host, with a link to start the meeting.
- Alternative Host will need to use the Start Meeting button/link in the email.
If they cannot find it in the mailbox, search for "invites you to join a Zoom meeting as alternative host" in inbox.
- NEW: Alternative Host(s) can be allowed to add/edit polls.
- For webinars, the user who schedules the meeting needs both a license and the webinar add-on; the alternative host only needs to be Licensed (webinar add-on not required).
Scheduling privilege
Designed to be used when someone else will do the scheduling; like an Executive Admin, Event Scheduler or Secretarial Duties:
- The Meeting HOST should first assign or grant Scheduler permission to schedule meetings.
- Scheduler to create new meeting on behalf of Meeting HOST.
The Meeting HOST will not have access to Polling feature.
Zoom allows users in the same organization to schedule meetings for one another. The scheduler can also access the Attendance Report and manage the Cloud Recording (if any).Setup
Your manager or colleague should sign in to https://nus-sg.zoom.us and grant you you scheduling privileges for their Zoom Licensed Account.
Instructions you can provide to your manager or tutors to assign scheduling privilege to you:This is how you can assign scheduling privileges to me.
Steps:- Go to NUS Zoom Web Portal: https://nus-sg.zoom.us
- Click on Settings.
- Search for "scheduling"
- Click Edit next to Assign scheduling privilege to.
- Click Add and type in my email address: _______@nus.edu.sg
- Check the Cloud Recording so I can manage the sharing of recordings of the sessions I schedule for.
- Check the Reports so I can access the reports of the sessions I schedule for.
- Click Save

Schedule Meeting for..
Check you can schedule a meeting via the NUS Zoom web Portal https://nus-sg.zoom.us
You will see a new option called "Schedule For" with a pull-down option with your manager's, colleague's, or tutor's name.Reports
To access the session attendance reports, use the pull down to select whose reports you'd like to access.
Active Hosts Report - Zoom
https://nus-sg.zoom.us/account/my/reportCloud Recording
To access the session cloud recordings, click Advanced Search and use the pull down to select whose reports you'd like to access.
For sessions hosted by others, you will have to click on the meeting topic.
Screen Sharing
When you start sharing your screen, the meeting controls will move into a floating menu that can be dragged around your screen.
It's located on the top of the screen. Hover your cursor to the top of the monitor.

- Mute/Unmute: Mute or unmute your microphone.
- Start/Stop Video: Start or stop your in-meeting video.
- Participants/Manage Participants: View or manage the participants (if the host).
- New Share: Start a new screen share. You will be prompted to select which screen you want to share again.
- Pause Share: Pause your current shared screen.
- Annotate / Whiteboard: Display annotation tools for drawing, adding text, etc.
- More: Hover over more for additional options.

- Chat: Open the chat window.
- Invite: Invite others to join the meeting.
- Record: Start recording locally or to the cloud.
- Allow/Disable participants annotation: Allow or prevent the participants from annotating on your shared screen.
- Show/Hide Names of Annotators: Show or hide the participants' name when they are annotating on a screen share. If set to show, the participant's name will briefly display beside their annotation.
- Optimize Share for Full-screen Video Clip: Start optimizing for a video clip in full screen mode.
Note: Do not enable this setting if you are not sharing a full screen video clip, as it will blur your screen share. - End Meeting: Leave the meeting or end the meeting for all participants.
- Start or join a Zoom meeting.
- Click Share Screen
 located in your meeting controls.
 - Switch to the Advanced tab, and then select Video

- Navigate to and select the video you wish to share from your computer, then click Open.
The video will now open within Zoom and be visible to attendees. - The sharer will also have the video controls to Play, Pause and slider controls.
When using the video share option, Zoom encodes the video from the file directly and shares it, effectively bypassing some of the limiting factors with standard content sharing.
Guide: https://support.zoom.us/hc/en-us/articles/360051673592
Recording
- Sign in to the NUS Zoom web portal https://nus-sg.zoom.us
- Click on Recordings.
- Find your meeting and click on the playback button.

- Click the scissors button to set the playback range.

- Note that:

- Drag the markers and check the playback range.
Once ready, click Save.
Zoom FAQs on Recordings
https://support.zoom.us/hc/en-us/articles/360040771752-Frequently-asked-questions-about-local-and-cloud-recording
Viewers will have to sign in with NUS Zoom account to watch the Zoom cloud recordings. External viewers will not be able to view the Zoom cloud recordings.
This article provides three different ways you can share your Zoom cloud recording with external viewers.
Set video for external viewing
- Go to http://nus-sg.zoom.us
- Click on Recording
- Search for respective recorded session
- Click on the Share button
- You have the option to:
- Change Who can view
- Share with specific people
- Click on Share Settings
Recommended to Set Expiration Date.
- Click Copy to retrieve the Recording URL and passcode.
Set account profile to allow external viewing for all upcoming recordings
- Go to https://nus-sg.zoom.us
- Click on Settings (left menu)
- Click on Recording (horizontal menu)
Disable "Require users to authenticate before viewing cloud recordings"
- Note: This will affect all your future Zoom cloud recordings.
Download MP4 and share on an external video hosting platform
- Go to http://nus-sg.zoom.us
- Click on Recording
- Search for session
- Click on the Meeting Topic
- Click Download
- Upload the MP4 to your department's YouTube page or NUS Mediaweb channel.
Publish Cloud Recording in LumiNUS
If you have scheduled the meeting in LumiNUS and Recorded to the Cloud, go to Past Sessions, click on the ... and click Publish Cloud Recording.
By default all cloud recordings will require sign in with NUS Zoom account to view.
To allow access for external viewers, you will need to enable it first. Follow this guide.
Cloud Recording
Sign in to your NUS Zoom web portal.
In the navigation menu, click Recordings.
You will see the list of cloud recordings that you had started.

Click More to access the download or delete the recording.
Click Share to display the recording link information and sharing settings, such as:
- only NUS Authenticated users only can view
- add expiry date
- viewers can download
- on-demand (registration required)
- password protection
You can also copy out the sharing information to clipboard to share with your viewers.

Local Recording
PC: C:\Users\User Name\Documents\Zoom\Session Title
Mac: /Users/User Name/Documents/Zoom/Session Title
Once converted, you can upload the MP4 file to your preferred video hosting site.
The conversion will be interrupted and caused an error if there is insufficient dis space or the laptop was shut down when conversion is in progress.
Check your "Disk space" and try and free up some space if it is low.
Do not convert local recording files by double-clicking the Zoom files.
Ensure you did not change the filename.
Follow the steps below to convert the files.
1. Sign in to the Zoom Desktop Client.
2. Click the Meeting tab.
3. Click the Recorded tab.
4. Select the meeting topic with the local recording.
5. Click the (...)
6. Click Convert.
Zoom Guide: https://support.zoom.us/hc/en-us/articles/201362753-Local-Recording-Fails-To-Convert
If you still need help, share the file via nBox and share it with the Webconferencing Helpdesk.
Not too sure where...
The one who schedule and host the session can check the Web Portal.
Click on Recordings > Cloud Recordings or Local Recordings.
https://support.zoom.us/hc/en-us/articles/206277393-Finding-and-Viewing-Recordings
It could also be that another participant was actually recording the meeting. Could be another host or another participant that you had granted permission to record. If this is the case, then it will record to their computer.
If you need to disable them, note that it will be disabled for all your future meetings.
- Sign in to NUS Zoom Portal at https://nus-sg.zoom.us
- Click on Settings on the left menu.
- Click on Recordings tab.
- Scroll down till you see the Recording Disclaimer and Multiple audio notifications of recorded meetings.
- Disable them using the buttons on the right.

Joining
Note
- When you join a session, your display name, email address, device information like type, name and IP address will be logged for troubleshooting purposes.
- You will be encouraged to turn ON your webcam for some lessons. Your host will have to share with you what is the recording for and intended audience.
- Make sure you and your environment are safe and ready before you Unmute Mic and Start Video.
- Use Virtual Background or position yourself with a wall behind you.
A Few Days Before
- Remember to download and install the latest Zoom client: Win | Mac | Linux | iPhone | Android.
- Join a Zoom Test Meeting to check your device capabilities.
15 Minutes Before
- Find a quiet space with a stable WiFi connection.
- Join Zoom following the instructions your instructor has provided:
- If your course is using Canvas, go to your course's Zoom tool.
- It could also be a join link URL sent via email or a calendar invite.
- It is better run the Zoom App or Desktop Client instead of running it from the browser.
- Close unnecessary windows or apps (e.g., Skype).
- Test your headset and webcam.
During the Zoom Meeting
- Click Start Video to begin sending your webcam.
- Click the Chat bubble to ask questions via text or as informal discussion. You can chat to everyone or a specific person. Some instructors may want a certain format like they will not entertain text chat until it comes to Q&A segment.
- Find out who else is in the meeting by clicking Participants. This is also where you can "raise your hand" to ask a question, answer a question, or use the Yes/No button.
- Always be prepared to share your screen. Close all other browsers and apps not required for the class.
- At the end of the class, click Leave Meeting.
View options. Toggles between:
- Speaker View: To focus on the speaker.
- Gallery View: To show all participants (up to 25 people).
- Full Screen: To maximize screen.
- Participants and attendees can select side-by-side mode during screen sharing.
Zoom Menu
The Zoom menu is at the bottom of the Zoom window. Hover your cursor over it if it is hidden. In screen sharing mode, it goes to the top of the screen.

Mute: Switch to turn on/off your microphone.
Start/Stop Video: Sending your webcam.
Invite: To invite others.
Share Screen: Allows you to share your desktop screen and specific windows.
Chat: To send messages to everyone or a specific person.
Record: If the host allows it. Not provided as a default. Records as a MP4 on your computer Documents\Zoom\Session Title.
Leave Meeting: Click this at the end of the meeting. Do not leave the Zoom meeting open.
More: Allows you to raise your hand, and other participants quick response button.
Tips
- Provide a clear video. Keep your face lit, and the background neat and tidy. A clean wall will be the best. If the window is behind, pull the blinds or curtains.
- Microphones pick up all ambient noise, so keep your mic muted unless you are speaking.
- Focus please. Avoid any other activities that will distract you.
Some meetings/webinars will require Authentication to Join only for NUS Zoom users.
When joining such events, check that you are signed in correctly on the browser and desktop client or mobile app.
Sign In at https://nus-sg.zoom.us. On https://zoom.us or Zoom App or Zoom client, click on SSO, company domain: nus-sg
When these events require registration, there will be checks during the registration process as well. Please provide the email address used with your valid NUS Zoom account (valid and activated).
If you have an NUS friendly email address, please provide your friendly email address. A typical error message:

Possible reasons:
- Mismatched email address: The email address supplied during registration did not match the NUS Zoom account. Use friendly email address.
- NUS Zoom account not valid: If you do not have an NUS Zoom account, please Log in to Zoom first, then activate the account.
- The browser cache issue: You may want to clear your browser cache first. Alternatively, open a browser in incognito/private browsing mode and copy/paste the registration URL.
To verify the email address of your Zoom account:
| Sign In | https://nus-sg.zoom.us | https://zoom.us or Zoom App or Zoom client |
| Verify Sign In Email Address | https://nus-sg.zoom.us/profile Scroll below to see the Sign In Email. | Click on the top right of your profile image or initials. |


Security & Privacy
For the safety and privacy of our NUS community and friends when Zooming, please note:
- Do not share the meeting ID and passcode on social media. Remind your participants not to do so as well.
CIT will not hesitate to suspend any NUS Zoom account and delete meetings without prior notice. - Waiting Room is highly recommended.
Host will have to admit participants from the waiting room into the meeting room.
If the name that join doesn't look familiar, you can message them to leave the meeting and rename themselves properly before joining in again. - Disable Join before host option is recommended.
Participants can only join after host has launched the Zoom session. - Enable "Only authenticated users can join" is recommended.
Select "Sign in to Zoom for NUS Staff and Students only".
This will restrict so that only NUS Staff and Students with NUS Zoom accounts will be able to join the meeting. - Update your Zoom Meeting Desktop Client and Mobile Application and inform your participants to do the same.
Familiarize yourself with the Security button.
It gives you quick access on managing what participants can do in your meeting.
Security Button Video Guide [NEW]
- Lock Meeting once all the participants are in.
- Limit Share Screen to Host(s) only.
- Prevent participants from Chatting.
- Prevent participants from Renaming Themselves
- Prevent participants from Unmuting Themselves
- Prevent participants from Start Video
- Suspend Participant Activities
Joining our Meetings
- Only the meeting organizer or LumiNUS will send the invitation emails. Zoom only sends out invitation link for meetings that require registration. Do not click any links from unverified sources. You can also go to Canvas Zoom to join if they were scheduled in Canvas.
- Some meeting will require authentication. Sign in using your NUS Zoom Account at https://nus-sg.zoom.us.
If you are signing in from the desktop client and mobile apps, select Sign In with SSO and company domain: nus-sg. - Join URLs for sessions scheduled by NUS Zoom accounts should start with https://nus-sg.zoom.us/...
- Do not forward the invitation link or message to others.
- Do not post the meeting details like links and passwords on any social media or chat groups.
- Your microphone and webcam will not automatically start sending.
Join Audio, only when you are ready. Start video, only when you are ready. - There will be a Recording status on the top left if the Host or someone approved, is recording the session.
Be aware that anyone in the meeting can record or do a screenshot, using any other tools and software.
Be cautious about what you say, show and share.
If it is a confidential document, consider sharing it on OneDrive or nBox instead of transferring the files or sharing the screen via Zoom.
This will require participants to authenticate themselves in order to access those files.- Be careful with files transferred in Zoom. Verify it was indeed sent by the host. Do not download or open any suspicious files.
- Text Chat too. Do not click on any suspicious URL links.
- Alert the host if someone in the participant list looks suspicious and shouldn't be in the meeting. Host can remove participants.
- Click Leave Meeting once you are done with the session.
Scheduling our Meetings
- Require Password for ALL Meetings.
- Consider giving the the Meeting ID and Password separately to participants. Avoid using the one click to join link.
- Enable registration. Option of automatic or manual approval.
- Enable only authenticated users can join in.
Participants will have to Sign In at https://nus-sg.zoom.us. with their NUSNET ID and password.
Participants signing in from the desktop client and mobile apps, to select Sign In with SSO and company domain: nus-sg. - Avoid using the same meeting ID and recurring session for a long period of time.
- Avoid using Personal Meeting ID.
- Enable Waiting Room. So you can have another level of control on who gets into the Meeting Room.
Security Button options
Once you have started the Zoom meeting, click on Security Button.
Select/unselect the relevant options.

What each option does:Lock Meeting: Prevents new participants from joining the meeting.
Enable Waiting Room: Enables Waiting Room for incoming new participants
Hide Profile Pictures: Hide all profile pictures, including the host. Display names are shown instead.
Share Screen: Allows participants to share their screens.
Chat: Allows participants to use the text chat function.
Rename themselves: Allow participant to rename themselves.
Unmute themselves: Allow participant to unmute their mic themselves.
Start Video: Allow participant to start sending their webcam video
Share Whiteboard: Allows participants to share whiteboards.
Suspend Participant Activities All video, audio, in-meeting chat, annotation, screen sharing, and recording during that time will stop, and Breakout Rooms will end.
- If you plan to record, ask permission from the participants first.
- End Meeting for All, once you have finished the meeting.
- If you have recorded to the Zoom cloud, do not share or leave the files on the cloud longer than necessary.
Set expiry date or delete them once you are done.
You may also view the video tutorial from here.
Additional Enhanced Features
Additional Resources
- NUS IT Advisory (12 April 2020)
- NUS IT Advisory (03 April 2020)
- Zoom's Message from CEO (01 April 2020)
- Zoom's Message on privacy (29 March 2020)
- Zoom Security
- Zoom Privacy and Policy
Alternative Applications
Others
For ease of searching contacts when calling or chatting, the Zoom Profile display name is taken from the University's CHRS or myEduRec system.
To change Display Name for each meeting:
A. During a Zoom Meeting
- Only possible if Host allows participants to rename themselves.
- Click on Participants button.
- In the Participant Panel on the right, look for your name (it's at the top).
- Click on "More" button beside your name and select Rename.
Type in your preferred display name for the meeting.
B. Before Joining the Zoom Meeting
- You will need the Meeting ID and passcode.
- Launch your Zoom Client/App
- Click on SSO, company domain: nus-sg
- Sign In with NUS ID and password.
- Click Join button or Join a Meeting
- In the Join Meeting window, type in Meeting ID and your Display Name.
- Click Join.

C. Host or co-host(s) can Rename participants during the meeting
- As the meeting host or co-host click Participants
 in the host controls to open the Participants panel.
 - Click (More) next to a participant's name.
- Click Rename: Change the participant name that is displayed to other participants. This change only applies to the current meeting.
D. Host or co-host(s) can Rename participants in Waiting Room
- As the meeting host or co-host, click Participants .
- After verifying the participant via Text Chat.
- In the Waiting Room section, click (More) next to a participant's name.
- In the drop-down menu, click Rename.
- Enter a new name, then click Change.
The participant will receive a notification that the host renamed them, as well as what they have been renamed to. Participants can click OK or Leave Meeting. Clicking OK does not admit them.
B. On the Profile Page
Go to https://nus-sg.zoom.us/profileIn the Name section, click on Edit.Type in your preferred display name.Click Save.
C. Your device might have remembered your name.
Launch your Zoom Client/AppClick on SSO, company domain: nus-sgClick Join button or Join a MeetingIn the Join Meeting window, type in Your Display Name. And check the box "Remember my name for future meetings".

To solve the Echo issues:
1) Isolate the participant
As a host, if it is a small group, you can do a Mute All and unmute individually to find the source. You might not have a time to do this in a big group. Do a Mute All and let them know to unmute only when given permission to talk.
2) Cause of Echo
- Participants not joining using headsets and joining using external speakers. So what happens is the built-in mic picks up audio from the external speakers causing echo from other.
Unfortunately, in most cases the one causing echo will not hear the echo. - Two or more participants with active audio joining from the same room (physically). If that is the case, only one device should Join Audio. All other devices should Leave Audio.
Guide: https://support.zoom.us/hc/en-us/articles/202050538-Audio-Echo-In-A-Meeting
While there are products meant for bigger rooms like the Logitech https://www.logitech.com/en-sg/video-collaboration.html available for purchase, there are existing equipment that your office may already have.
Most offices in NUS will have the the Polycom Trio used for boardroom telephone calls. That Polycom Trio can also be connected to a laptop; either Bluetooth or USB.
USB
Use a Micro USB cable to connect the Polycom Trio with the laptop.
Select the Polycom's Speaker and Microphone device in Zoom.
Run the Test Speaker and Microphone to configure it.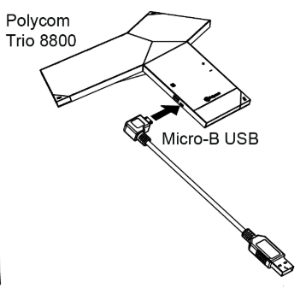
- Share screen to breakout rooms NEW
- Launch Breakout Rooms from the Host Controls during a meeting
- Options for Breakout Rooms
- Assigning Participants to Rooms
- Preparing Breakout Rooms
- Managing Breakout Rooms in Progress
- Ask for Help
- Broadcasting a Message to All Breakout Rooms
- Preassigning Breakout Rooms
- Prerequisites
- Limitations
- Pre-assign Breakout Room via the Web Portal
- Pre-assign Breakout Room using the .csv file
Breakout rooms allow you to split your students into their discussion groups. The Host can split them automatically, manually or let them select and enter rooms.
- Host(s) can split them automatically or manually.
- There can be up to 100 Breakout Rooms per meeting, maximum of 300 per breakout room (If you have Large Meeting for 500/1000, then it will be 500/1000 per breakout room).
- Breakout Room participants have full audio, video and screen share capabilities
- Host(s) can move between Breakout Rooms
- While in a Breakout Room, participants can request help from a host. Hosts(s) will receive a notification.
You can also share Participating in Breakout Rooms with your students for some information on using breakout rooms as a participant
Share screen to breakout rooms NEW
Once breakout rooms are open, the host or co-host can share their screen from the main session directly into all open breakout rooms. This allows the presenter to share visual information to all breakout rooms as once, guiding them on next steps or tasks.
- Click Share Screen in the meeting controls.
- Enable the Share to breakout rooms option along the bottom of the share window.
- Choose what you would like to share, including an entire screen, a specific open program, or others.
- Click Share. The selected content will be shared to all breakout rooms. Any active shares in any breakout rooms will be interrupted for the host's/co-host's shared screen. Annotation or whiteboarding is saved before the host's shared content is viewed.
Launch Breakout Rooms from the Host Controls during a meeting
- Start an instant or scheduled meeting.
- Click Breakout Rooms.
- Select the number of rooms you would like to create, and how you would like to assign your participants to those rooms:
- Automatically: Let Zoom split your participants up evenly into each of the rooms
- Manually: Choose which participants you would like in each room
- Let participants choose room: Participants can select and enter rooms on their own.

- Click Create Breakout Rooms.
- Your rooms will be created, but will not start automatically. You can manage the rooms prior to starting them by following the instructions below.
Options for Breakout Rooms
- After creating the breakout rooms, click Options to view additional Breakout Rooms options.

- Check any options that you would like to use for your breakout rooms.
- Allow participants to choose room: Checking this option will allow all participants to join into any rooms.
- Allow participants to return to the main session at any time: If this option is checked, the participants can move back to the main session from their meeting controls. If this is disabled, they need to wait for the host to end the breakout rooms.
- Automatically move all assigned participants into breakout rooms: Checking this option will move all participants into the breakout rooms automatically. If this option is unchecked, the participants will need to click Join to be added to the breakout room.
- Auto close breakout rooms after x minutes: If this option is checked, the breakout rooms will automatically end after the configured time.
- Notify me when the time is up: If this option is checked, the host will be notified when the breakout room time is up.
- Countdown after closing breakout rooms: If this option is checked, the participants will be given a countdown of how much time they have left before being returned to the main room.
- Follow the steps below to assign participants to rooms or click Open All Rooms to start the breakout rooms.
Assigning Participants to Rooms
To assign participants to your rooms, select Assign next to the room you wish to assign participants to and select participants you want to assign to that room. Repeat this for each room.

Once a participant has been assigned (manually or automatically), the number of participants will show in place of the Assign button.

Preparing Breakout Rooms
After manually or automatically assigning participants to rooms, you can rearrange the participants. Participants who are not assigned to breakout sessions will remain in the main meeting when the rooms are started.
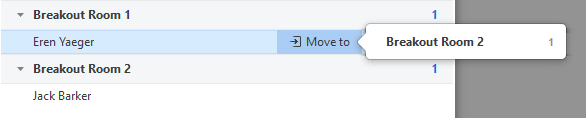
- Move to (participant): Select a room to move the participant to.
- Exchange (participant): Select a participant in another room to swap the selected participant with.

- Delete Room: Delete the selected room.
- Recreate: Deletes existing breakout rooms and creates new ones.
- Add a Room: Add another breakout room.
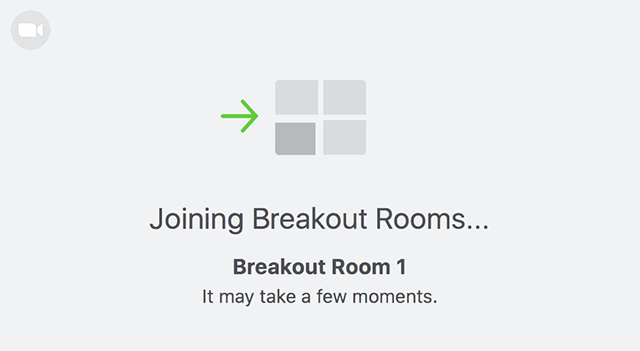
- Open All Rooms: Start the rooms. All assigned participants will be moved to their respective rooms after confirming the prompt to join the breakout room. If allowing participants to choose their own room, they can open the list of rooms and choose which to join. The host will be left in the main meeting until manually joining one of the rooms. The participants (and the host when manually joining a room) will see the following message shown when joining the breakout room.
Managing Breakout Rooms in Progress
Once the Breakout Rooms have been started, the participants will be asked to join the Breakout Session. The host will stay in the main meeting until joining a session manually. If a participant has not joined the session yet, it will be noted by (not joined) next to their name.
- Join: Join the breakout room.
- Leave: Leave the room and return to the main meeting (only shows when in a breakout room).
- Close All Rooms: Stops all rooms after a 60 second countdown, shown to the host and participants, and returns all participants back to the main meeting.
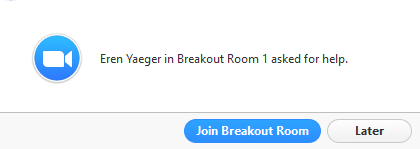
Ask for Help
Participants in breakout rooms can request that the meeting host join their meeting by clicking Ask for Help.
The host will be prompted to join the room where the request originated from. Click Join Breakout Room to join the room.
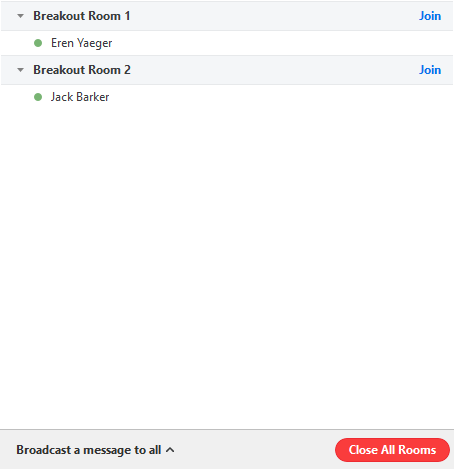
Broadcasting a Message to All Breakout Rooms
The host can broadcast a message to all breakout rooms to share information with all participants.
- Click Breakout Rooms in the meeting controls.

- Click Broadcast a message to all, enter your message and click Broadcast.
- The message will now appear for all participants in Breakout Rooms.

Preassigning Breakout Rooms
Prerequisites
- Breakout Room is enabled in your meeting settings
- Host: Zoom Desktop Client on Windows or macOS, version 5.7.0 or higher
- Participants: Zoom Desktop Client or Mobile App, version 5.7.0 or higher
Note:- When joining a meeting with pre-assignments, ALL participants need to be signed in to their NUS Zoom account on the desktop client for pre-assignments to work.
Participants will not be placed in the pre-assigned room if they join from the web client.
Participants will not be placed in the pre-assigned room if the email does not match.
Check NUS Zoom Sign In and Email Address
- Click Sign in with SSO.
- Type in the company domain as: nus-sg and click Continue.
Limitations
- You can only pre-assign participants that have a Zoom account (internal or external Zoom users).
- When pre-assigning participants using the web portal, you can only pre-assign NUS Zoom users that are in the same account.
- To pre-assign participants that are external Zoom users, import a CSV file.
- If you have registration enabled and external participants register for the meeting, you need to assign them to breakout rooms during the meeting.
- Up to 200 participants can be pre-assigned to breakout rooms.
Pre-assign Breakout Room via the Web Portal
- Sign in to the NUS Zoom web portal.
- Click Meetings and schedule a meeting.
- In the Meeting Options section, select Breakout Room pre-assign and click Create Rooms.
- Click the plus icon beside Rooms to add breakout rooms.
- Hover over the default breakout room name and click the pencil icon to rename it.
- In the Add participants text box, search for participants' name or email address to add them to the breakout room.
Note: You can add internal Zoom users that are in the same account. To pre-assign participants that are external Zoom users, import a CSV file. - (Optional) Use these options to edit your breakout rooms and participants:
- Click and drag a participant's email address to change the order.
- Hover over a participant's name to see options to move them to another room or remove them from the current room.
- To delete a breakout room, hover the room name in the left panel and click the trash bin icon.
- Click Save.
Pre-assign Breakout Room using the .csv file
- Sign in to the NUS Zoom web portal.
- Click Meetings and schedule a meeting.
- In the Meeting Options section, select Breakout Room pre-assign and click Import from CSV.
- Click download to download a sample CSV file you can fill out.
- Open the CSV file with spreadsheet software like Microsoft Excel.
Note: You can specify internal or external Zoom users. - Fill in the Pre-assign Room Name column with the breakout room name, and the Email Address column with the assigned participant's email address.
- Save the file.
- Drag and drop the file in the web portal.
Zoom will verify that the email address has a Zoom account.
Note: There is a 20sec delay for viewers joining via Livestream on Facebook, YouTube or NUS Mediaweb.
Prepare Mediaweb Stream
- Go to https://mediaweb.ap.panopto.com/
- Sign in with NUSNET ID and password.
- Click on Create. If you do not have access to Create, please refer to Requesting for access to create and upload files to MediaWeb .
- Select Webcast.
- Type in Name, Select Folder Destination and click Create.
- Click on Manage.
- Click on RTMP Source.
- Copy out the Server URL to a NotePad or Text Edit. This will be the Stream URL.
- Copy out the Stream keys to a NotePad or Text Edit. This will be the Stream Key.

- Click on Share.
- Select Who has access to this livestream.
- Add People or Groups as Viewers, if you have a module code.
- Who can access this video:
- Anyone at your organization who has the link

- Anyone at your organization who has the link
- Copy the Viewer Link; to a NotePad or Text Edit. This will be the Live streaming page URL.
- Select Who has access to this livestream.
Enable Livestream to Mediaweb for your Zoom Account
You may skip this if it has been enabled before.
- Go to https://nus-sg.zoom.us
- Sign In with NUSNET ID and password.
- Click on Settings.
- Enable LiveStream.
Copy Stream Information to your Zoom meeting
- Go to https://nus-sg.zoom.us
- Sign In with NUSNET ID and password.
- Schedule a Meeting. (Click on meeting topic if it has been created)
- Provide meeting details. Click Save.
- Click on Live Streaming
- Click Configure Custom Streaming Service.

- Provide the 3 information from Mediaweb:
- Stream URL
- Stream key
- Live streaming page URL

Ready to start Zoom and Livestream
Note: The stream setup is VALID FOR ONE TIME USE ONLY.
If you are testing the Livestream for a dry run, you will need to setup another Livestream with a different stream key.
- Launch Zoom Session a few minutes earlier.
- Click More > Live on Custom Live Streaming Service.
- Status on Zoom indicates it’s LIVE: on Custom Live Streaming Service.
- Consent to stay in meeting while Zoom livestreams.

- The livestream will appear on your web browser.
Click Play to test the stream.
Note: There will be a 15-20sec delay.
Your webcam will also not be mirrored.
Once you can see and hear your Zoom session streaming successfully, you may close the. web browser.
Check that there is a microphone icon besides all the names in the Participants Panel.
Absence of a mic indicates that the participant has not Joined with Computer Audio.
Check that it does not have a red line on the mic.

On individual screen, check that your own mic Is not muted.
Click “Unmute on bottom left. Mic indicator should turn green as you speak.
Click the “^” button to re-select the Mic or do a “Test Speaker and Microphone”.

Alternative Platform
Besides Zoom, in NUS we have:
- Microsoft Teams for chat, file sharing and video meet (up to 250 participants).
- Skype for Business for meeting, sharing and instant messaging.
(Note: All NUS Staff and Students have access to Office 365, Teams and Skype for Business with their NUSNET ID).